Your lymphatic system doesn’t have a pump. Unlike your cardiovascular system, which relies on your heart to keep blood moving, lymph fluid depends on muscle contractions, breathing, and manual manipulation to circulate. When it stagnates, you notice, puffy face in the morning, sluggish energy, and that frustrating bloated feeling that won’t quit. Gua sha for lymphatic drainage offers a simple, effective solution you can practice at home with nothing more than a smooth-edged tool and a few minutes of your time.
At Doc Blackstone Acupuncture, we’ve spent over 35 years working with traditional Chinese medicine techniques, including our signature ceramic spoon method for deep tissue work. Gua sha operates on similar principles, using gentle, directional strokes to move stagnant fluid and encourage healthy circulation. While our San Antonio clinic focuses on hands-on, personalized treatment, we recognize that empowering you with at-home practices extends healing beyond our doors.
This guide walks you through everything you need to know: the science behind lymphatic drainage, step-by-step routines for your face and body, tool recommendations, and the techniques that actually work. Whether you’re dealing with morning puffiness, post-workout swelling, or simply want to support your body’s natural detoxification process, you’ll leave here with a practical routine you can start today.
What gua sha can and cannot do for lymph flow
You need to understand the realistic limits of this technique before you invest time in it. Gua sha for lymphatic drainage supports your body’s natural fluid movement through manual stimulation, but it won’t cure underlying medical conditions or replace professional treatment when you need it. Setting clear expectations helps you use this tool effectively without relying on it for problems it wasn’t designed to solve.
What gua sha does well for lymphatic drainage
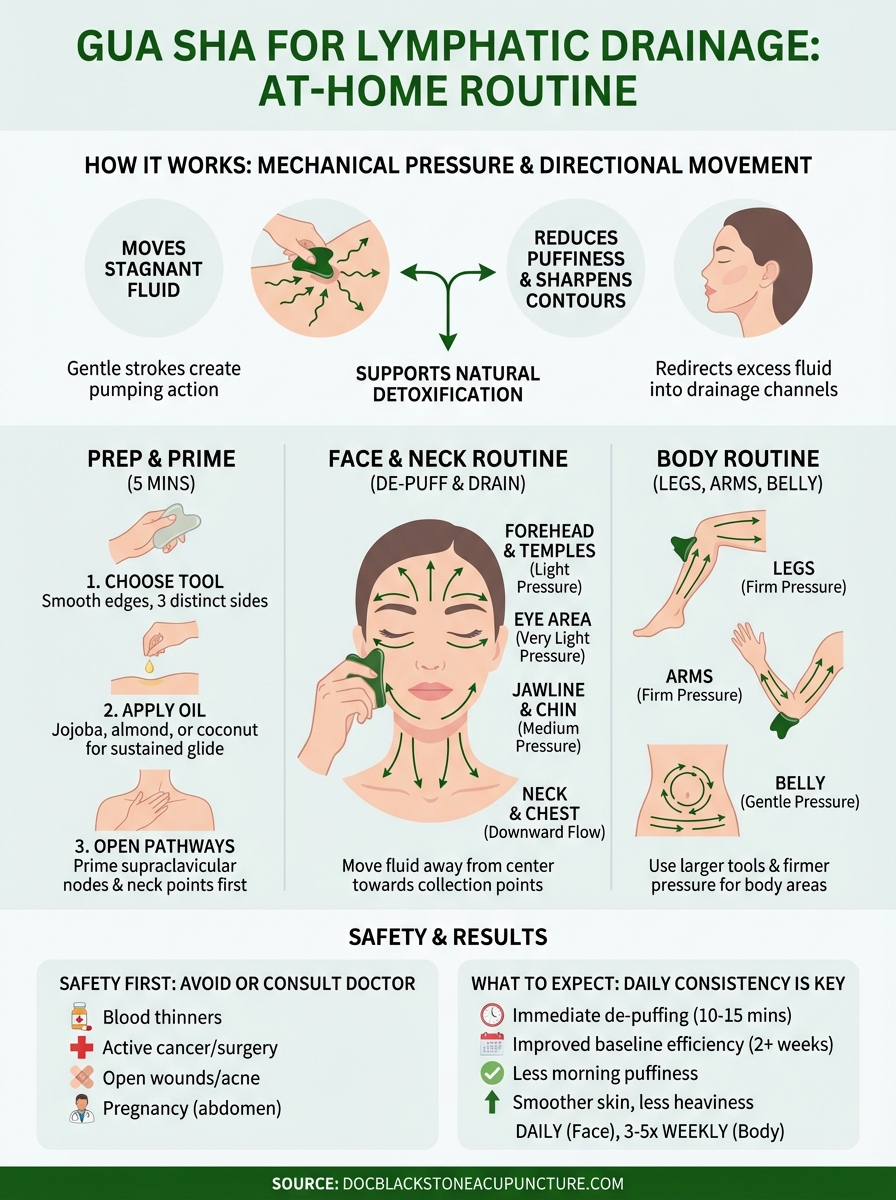
Your lymphatic system responds directly to mechanical pressure and directional movement, which is exactly what gua sha provides. When you apply gentle, sweeping strokes along lymphatic pathways, you create a pumping action that helps move stagnant fluid toward lymph nodes for processing. The smooth edge of your tool creates consistent, controlled pressure that reaches superficial lymphatic vessels just beneath your skin’s surface.
Facial puffiness reduces noticeably after a proper routine because excess interstitial fluid gets redirected into functioning drainage channels. You’ll see your jawline sharpen, under-eye bags shrink, and overall facial contours become more defined within minutes of completing your practice. This temporary improvement happens because you’ve manually assisted what your body normally does on its own, just at a faster, more targeted rate. The technique also stimulates circulation, bringing fresh blood to tissues while clearing metabolic waste that contributes to dull skin and inflammation.
Your body responds to regular practice by maintaining better fluid balance throughout the day. Consistent gua sha sessions train your lymphatic pathways to function more efficiently, reducing how often fluid accumulates in problem areas. Think of it as physical therapy for your drainage system, where repeated, intentional movement creates lasting improvements in how your tissues handle fluid exchange.
Gua sha works by providing the mechanical stimulus your lymphatic system needs to move fluid, not by creating new drainage pathways or fixing damaged vessels.
What gua sha cannot replace or fix
Chronic lymphedema requires medical supervision and certified lymphatic drainage therapy from a trained professional. If you have significant, persistent swelling that doesn’t respond to home techniques, you’re dealing with a condition that needs diagnostic imaging and specialized treatment protocols beyond what any at-home tool can provide. Gua sha won’t address the underlying vascular or lymphatic system damage that causes true lymphedema.
You cannot use this technique to treat active infections, blood clots, or undiagnosed lumps in your face or body. These conditions require immediate medical evaluation, and applying pressure or stimulation can worsen your situation or delay necessary care. The same applies to open wounds, severe acne, or inflammatory skin conditions that need dermatological treatment first. Your tool shouldn’t replace professional assessment when something feels wrong or doesn’t improve with basic home care.
Cancer patients undergoing active treatment should avoid gua sha near tumor sites or in areas affected by radiation therapy or recent surgery. While gentle lymphatic work can help with certain side effects of treatment, you need clearance from your oncology team before starting any manual therapy. This isn’t about gua sha being dangerous in general, it’s about respecting situations where medical oversight takes priority over self-care practices.
Structural problems like herniated discs, torn ligaments, or damaged lymph nodes from previous surgeries won’t heal through surface-level manipulation. Your gua sha tool works with healthy tissue systems, not broken ones. When you need deep repair work, you’re looking at the kind of hands-on structural therapy we provide at Doc Blackstone Acupuncture, where direct assessment and skilled manipulation address root causes rather than surface symptoms.
Safety checks before you start
You need to complete a thorough assessment before you touch your skin with any tool. Gua sha for lymphatic drainage works by applying deliberate pressure to tissues that contain blood vessels, nerves, and delicate lymphatic channels, which means careless technique or poor timing can create problems instead of solving them. Your five-minute safety check prevents complications that could set back your progress or worsen existing conditions you didn’t know about.
Medical conditions that require doctor approval first
Contact your physician before starting if you take blood thinners like warfarin, aspirin, or clopidogrel. These medications change how your blood vessels respond to pressure, making you significantly more prone to bruising or internal bleeding from techniques that would normally be safe. Your doctor can tell you whether you need modified pressure, specific avoidance zones, or should skip gua sha entirely while on your current medication protocol.
Active cancer treatment, recent surgery, or diagnosed blood clotting disorders require medical clearance before you attempt any manual lymphatic technique. These conditions affect your body’s ability to handle increased fluid movement or respond safely to external pressure. Pregnancy during the first trimester also needs approval, particularly if you plan to work on your abdomen or lower back regions where pressure points may affect uterine activity.
Assess your current skin and tissue condition
Examine the areas you plan to treat under good lighting before each session. Active acne with pustules, open cuts, or infected skin means you skip those zones completely until they heal. Your tool can spread bacteria, worsen inflammation, or damage tissue that needs rest rather than stimulation. Check for suspicious moles, lumps, or skin changes you haven’t had evaluated yet, these need dermatological assessment before you apply any pressure or manipulation.
Skip gua sha on areas with visible spider veins, varicose veins, or broken capillaries, as direct pressure can worsen these vascular conditions.
Redness, heat, or swelling that appeared suddenly signals possible infection or acute inflammation requiring medical attention first. Your lymphatic system already works overtime during infections, and adding manual stimulation can spread bacteria or viral particles to new areas. Wait until you’ve healed completely before resuming your routine.
Pressure guidelines and immediate stop signals
Your skin should show light pink flushing that fades within 30 minutes after proper technique. Intense redness lasting hours, purple bruising, or broken skin means you applied too much force or held pressure too long in one spot. Start with feather-light strokes you can barely feel, then gradually increase until you sense gentle tissue movement without pain or discomfort.
Stop immediately if you experience sharp pain, dizziness, nausea, or unusual headache during or after your session. These symptoms indicate you’ve either hit a contraindicated area or applied excessive stimulation your system can’t process safely. Rest, drink water, and contact a healthcare provider if symptoms persist beyond 15 minutes.
Choose a tool, oil, and set up your skin
Your equipment setup determines how effectively you can perform gua sha for lymphatic drainage and whether you’ll get consistent results or frustrating inconsistency. The wrong tool creates uneven pressure, scratches your skin, or fails to reach the contours you need to work. The wrong oil absorbs too quickly or clogs your pores, turning what should be smooth, gliding strokes into dragging friction that irritates tissue instead of draining it. Your five-minute preparation process sets up everything else that follows.
Tool material and shape selection
Smooth, polished stones work better than plastic or metal for facial lymphatic work because they maintain consistent temperature and glide without catching on skin texture. Rose quartz, jade, and bian stone all provide adequate smoothness, but the specific material matters less than the quality of the polish and edge design. Run your finger along every edge before purchasing to check for rough spots or uneven surfaces that will scratch during use.
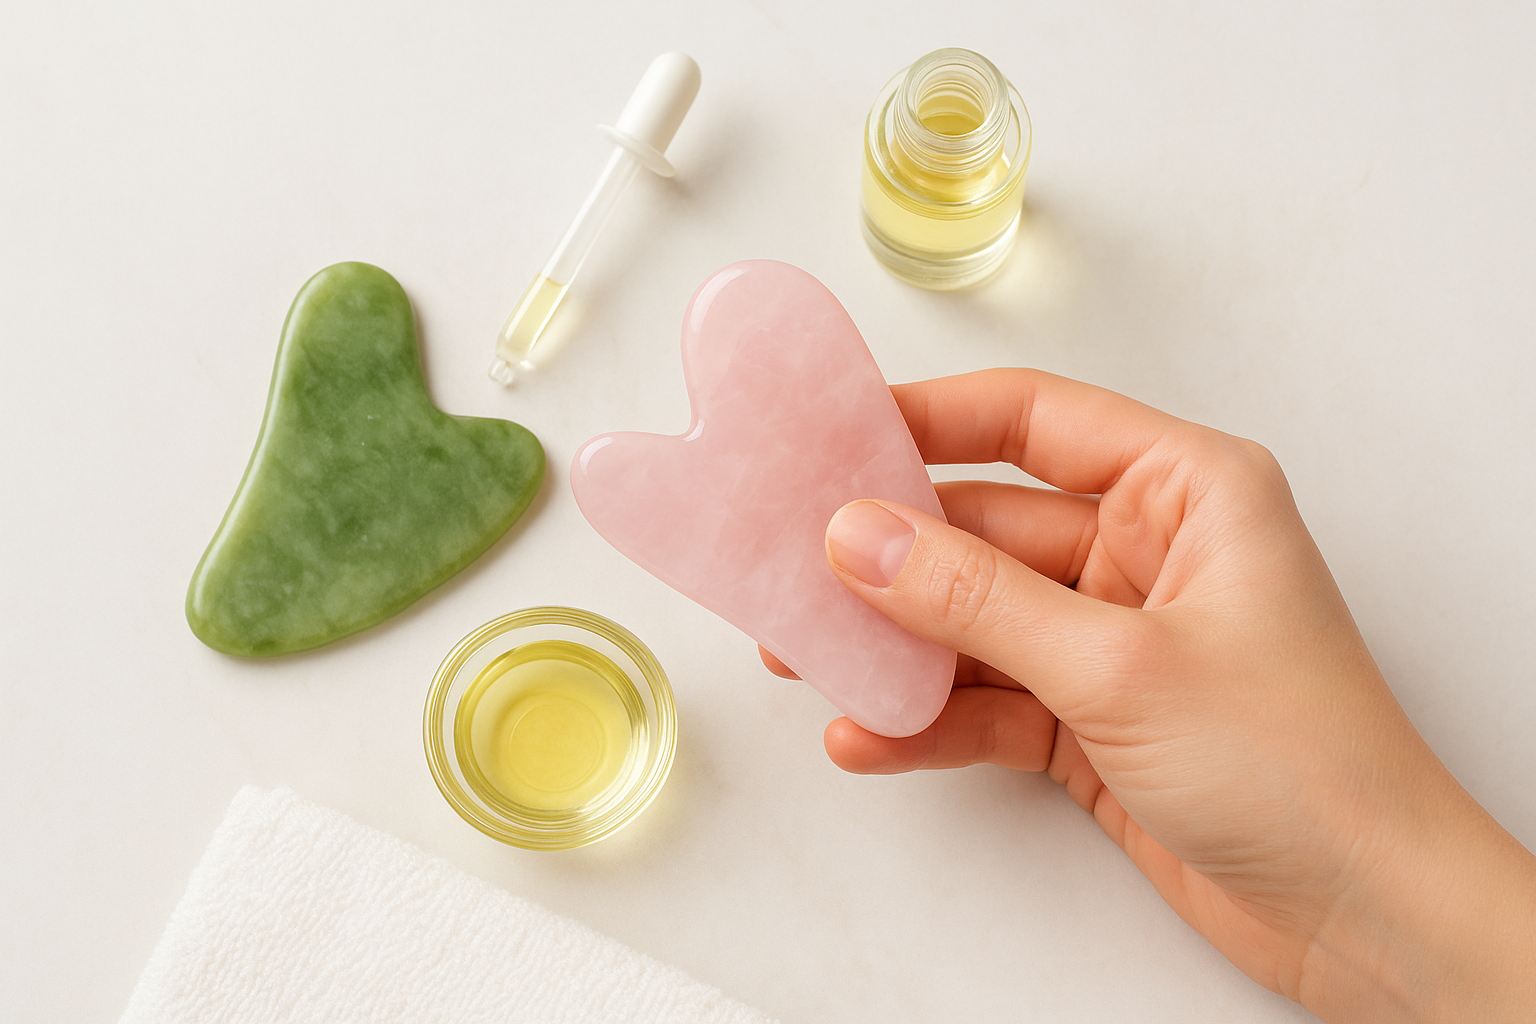
Your tool needs at least three distinct edges: a long, gently curved side for broad strokes, a smaller curved notch for jawline and cheekbone work, and a pointed tip for precise pressure around lymph nodes. Avoid tools with sharp angles or aggressive ridges marketed for "deep scraping," as those designs work against the gentle, superficial pressure lymphatic drainage requires. Your palm should hold the tool comfortably without strain, typically between 3 and 5 inches in total length.
Body work requires a larger tool with longer edges to cover more surface area efficiently. Stainless steel or buffalo horn tools handle the increased pressure needed for legs and arms without breaking, though they feel colder initially against bare skin.
Oil selection for smooth glide
Choose oils that stay slippery for at least 10 minutes without absorbing completely into your skin. Jojoba, sweet almond, or fractionated coconut oil provide the sustained glide lymphatic strokes require, while grapeseed oil works if you prefer something lighter. Apply enough that your tool moves freely without dragging, typically 4 to 6 drops for your entire face or a tablespoon for body sections.
Your oil should leave a thin, visible sheen on skin throughout your entire session, not disappear after the first few strokes.
Skip thick creams, lotions, or fast-absorbing serums that create friction instead of slip. Essential oils need dilution in a carrier base before application, never use them directly on skin before gua sha work.
Skin preparation steps
Cleanse your face or body area with warm water and gentle cleanser to remove makeup, dirt, and oils that could trap bacteria under your tool. Pat your skin until it feels barely damp rather than dripping wet, as this helps oil spread evenly without diluting its effectiveness.
Apply your chosen oil in upward, outward strokes that follow the direction you’ll use during actual gua sha work. This pre-application warms the tissue slightly and gives you immediate feedback about whether you’ve used enough product. Keep a small towel nearby to wipe excess oil from your hands so your tool doesn’t slip during treatment.
Step 1. Open the drainage pathways first
Your lymphatic system functions like a one-way street network that ends at specific collection points near your collarbone. Before you move fluid anywhere with gua sha for lymphatic drainage, you need to clear space at these terminal drainage sites so fluid has somewhere to go. Attempting facial or body work without this preparation step creates traffic jams in your lymphatic vessels, pushing fluid against closed pathways that can’t process it. Your two-minute priming sequence opens these critical exit points and sets up successful drainage throughout your entire session.
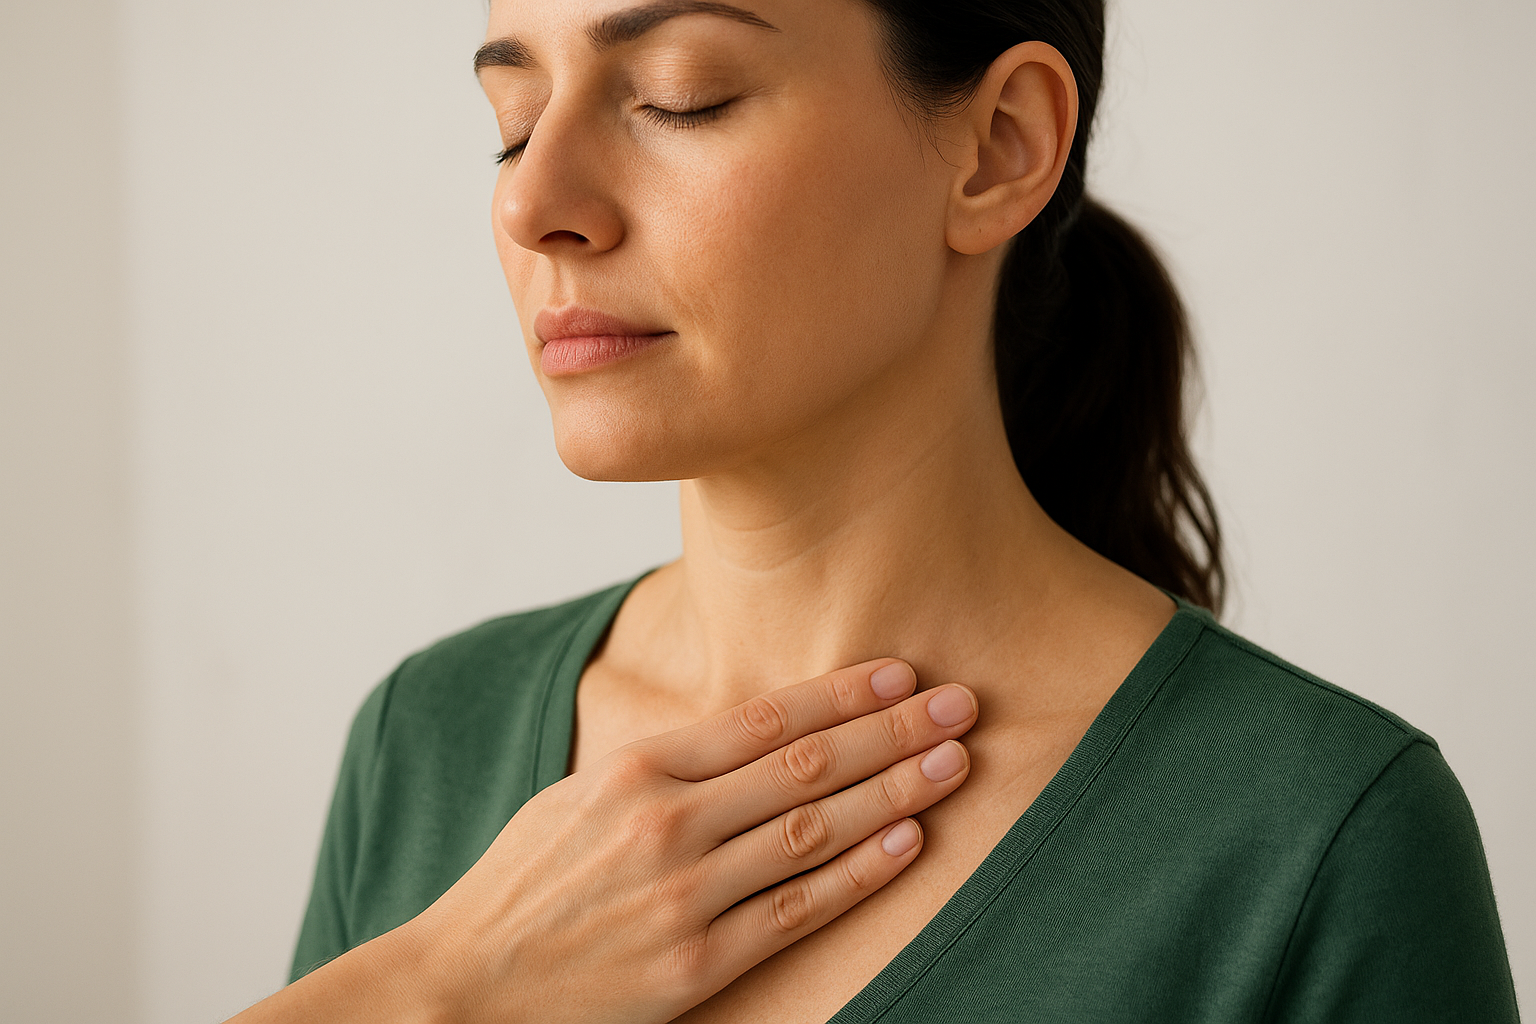
Major drainage collection points
The supraclavicular nodes sit in the hollow spaces above your collarbones on both sides of your neck. These nodes serve as the final collection point for lymphatic fluid from your entire upper body before it returns to your bloodstream. Place your fingertips in these hollows and feel for a slight depression, this is where you’ll focus your initial clearing work.
Your neck also contains cervical lymph nodes running along the sides of your sternocleidomastoid muscle, the thick band that appears when you turn your head to the side. These secondary collection points process fluid from your face and scalp before passing it down to the supraclavicular region.
The drainage priming sequence
Follow these exact steps before touching your face or body with your gua sha tool:
Place three fingers flat in the hollow above your right collarbone and press gently downward toward your chest, using light pressure you can barely feel against the bone beneath.
Hold this pressure for 5 slow, deep breaths while visualizing fluid draining from this point into your cardiovascular system.
Release pressure, then repeat the same process on your left supraclavicular hollow for another 5 breaths.
Move to your neck by placing flat fingers along the right side of your neck from just below your ear down to your collarbone, then gently stroke downward 5 times.
Switch to your left neck and repeat the same 5 downward strokes.
Opening your drainage pathways before moving fluid prevents backup and ensures everything you mobilize has a clear exit route through your system.
This priming process takes less than two minutes but multiplies the effectiveness of every stroke you make afterward. Your supraclavicular nodes can now receive and process the fluid you’ll redirect during facial and body work. Skip this step and you’ll notice less dramatic results, as you’re essentially trying to pour liquid into a container that’s already full.
Step 2. Do a face routine to de-puff and drain
Your facial lymphatic vessels follow specific pathways that start at the center of your face and move outward toward your ears and down your neck. Each stroke you make with your gua sha tool needs to follow these natural drainage routes, always moving fluid away from the center and toward the collection points you just opened. Your face routine targets the three zones where fluid accumulates most noticeably: forehead and temples, under-eye and cheekbone areas, and jawline with chin. Complete this sequence in order for maximum de-puffing effect.
Forehead and temple drainage strokes
Start at the center of your forehead, just above your eyebrows. Hold your tool flat against your skin at a 15-degree angle so the edge makes full contact without digging in. Sweep upward and outward toward your hairline in one smooth motion, applying gentle pressure you’d rate as a 3 out of 10. Repeat this stroke 5 times on each side of your forehead, always lifting your tool completely off your skin before starting the next stroke rather than dragging it back.
Move to your temples by placing the curved edge of your tool at the outer corner of your eyebrow. Glide it back toward your hairline and slightly downward toward your ear, following the natural direction fluid drains from this area. Complete 3 strokes on each temple, using the same light pressure throughout.
Eye area and cheekbone technique
Place the smaller curved notch of your tool at the inner corner of your eye where your nose meets your brow bone. Sweep gently under your eye following the orbital bone, moving outward toward your temple. This stroke requires the lightest pressure of your entire routine since the skin here is thin and delicate, no more than a 2 out of 10. Perform 3 passes under each eye, never pulling or dragging the skin.
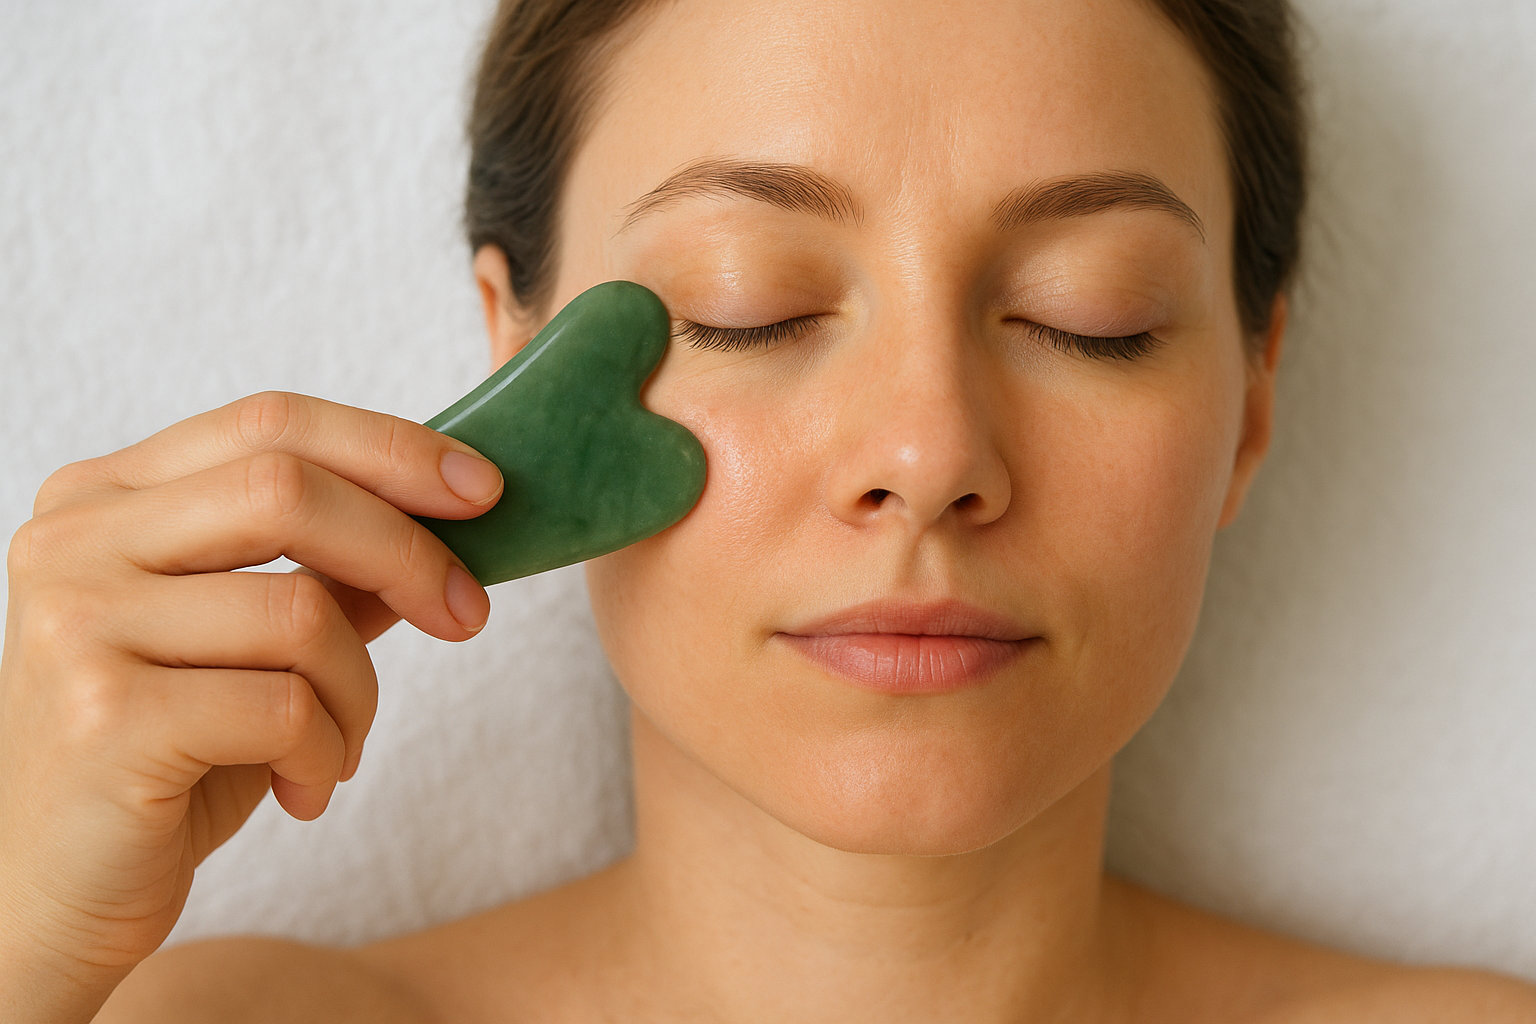
Switch to your cheekbones by positioning the long edge of your tool at the side of your nose. Glide it across your cheek following the bone structure toward your ear, using slightly firmer pressure than you used around the eyes. Make 5 strokes on each cheek, covering the area from your nose to your ear in smooth, continuous movements.
Your strokes should feel soothing and create visible flushing, not pain or intense redness that lasts more than a few minutes.
Jawline and chin definition work
Start under your chin in the center and sweep your tool along your jawbone toward your ear using firm, confident pressure. This area tolerates more force than your upper face, so increase to a 5 out of 10 pressure level. Complete 5 strokes on each side of your jaw, making sure your tool follows the bone edge rather than sliding onto your neck.
Finish by working the center of your chin. Place your tool flat against the indent below your lower lip and stroke downward toward the bottom of your chin, then sweep outward following your jawline. Perform 3 strokes on each side to complete your facial gua sha for lymphatic drainage sequence.
Step 3. Add neck and chest strokes for better flow
Your facial routine moves fluid down toward your neck, but that fluid needs a clear path to reach the supraclavicular nodes you opened in step one. Without dedicated neck and chest work, you create bottlenecks that limit how much puffiness actually drains from your face. This connecting sequence takes less than three minutes but transforms your results from temporary relief to noticeable, lasting reduction in facial swelling. Your neck and chest strokes complete the gua sha for lymphatic drainage pathway by moving accumulated fluid from your lower face through your neck and into the final collection points above your collarbones.
Why neck and chest work completes facial drainage
Fluid from your face naturally drains through cervical lymph nodes along the sides of your neck before reaching the supraclavicular region. When you skip this area, fluid backs up in your lower face and jaw because downstream pathways remain congested. You’ll notice your jawline definition disappears quickly, and morning puffiness returns within hours instead of staying reduced throughout the day.
Your chest area contains multiple lymphatic channels that feed into your supraclavicular nodes from different directions. Working this region ensures fluid from your neck has maximum capacity to drain, while also addressing any stagnation in your upper chest and décolletage that contributes to that heavy, congested feeling.
Front neck stroke sequence
Place your tool flat against the right side of your neck just below your ear, where your jaw meets your neck. Sweep downward in one smooth motion toward your collarbone, using medium pressure rated at a 4 out of 10. Complete 5 strokes on the right side, then switch to your left side for another 5 strokes. Never stroke upward on your neck, as this moves fluid against the natural drainage direction.
Work the front center of your neck by placing your tool against your throat just below your chin. Glide it straight down toward the hollow of your throat where your collarbones meet, using lighter pressure than you used on the sides. Perform 3 gentle strokes down the center, being careful to avoid pressing too hard on your trachea or thyroid area.
Your neck strokes should always move downward and slightly outward, following gravity and your lymphatic system’s natural flow toward the supraclavicular nodes.
Chest and décolletage technique
Position your tool at the center of your chest between your collarbones. Sweep it outward and slightly downward toward your armpit in a diagonal line, using firm pressure similar to what you used on your jawline. Make 5 strokes on each side of your chest, covering the area from your sternum to where your shoulder begins.
Finish by placing your tool in the supraclavicular hollow above your right collarbone and making 3 small circular movements, barely pressing into the tissue. Repeat on your left side. This final step reinforces the drainage pathway you opened at the beginning and ensures maximum fluid clearance.
Step 4. Use a body routine for legs, arms, and belly
Your body holds significantly more lymphatic fluid than your face, which means larger surface areas need different tool pressure and stroke length to achieve drainage. Body work requires a bigger tool with longer edges and firmer pressure to reach through thicker skin and muscle tissue where fluid accumulates. This routine addresses the three areas where people notice the most stagnation: heavy, swollen legs after sitting or standing all day, puffy arms that feel tight in clothing, and belly bloat that won’t resolve despite dietary changes. Your body sequence takes about 10 minutes and dramatically improves how fluid circulates through your lower extremities.
Leg drainage technique
Start with your right leg first, always working from bottom to top against gravity. Sit comfortably where you can reach your ankle without strain. Apply a tablespoon of oil from your ankle to your hip in upward strokes to ensure complete coverage. Place your tool flat against the inside of your ankle and sweep upward along your shin bone toward your knee, using firm pressure rated at a 6 out of 10. Make 5 long strokes from ankle to knee, lifting your tool completely off your skin between each pass.
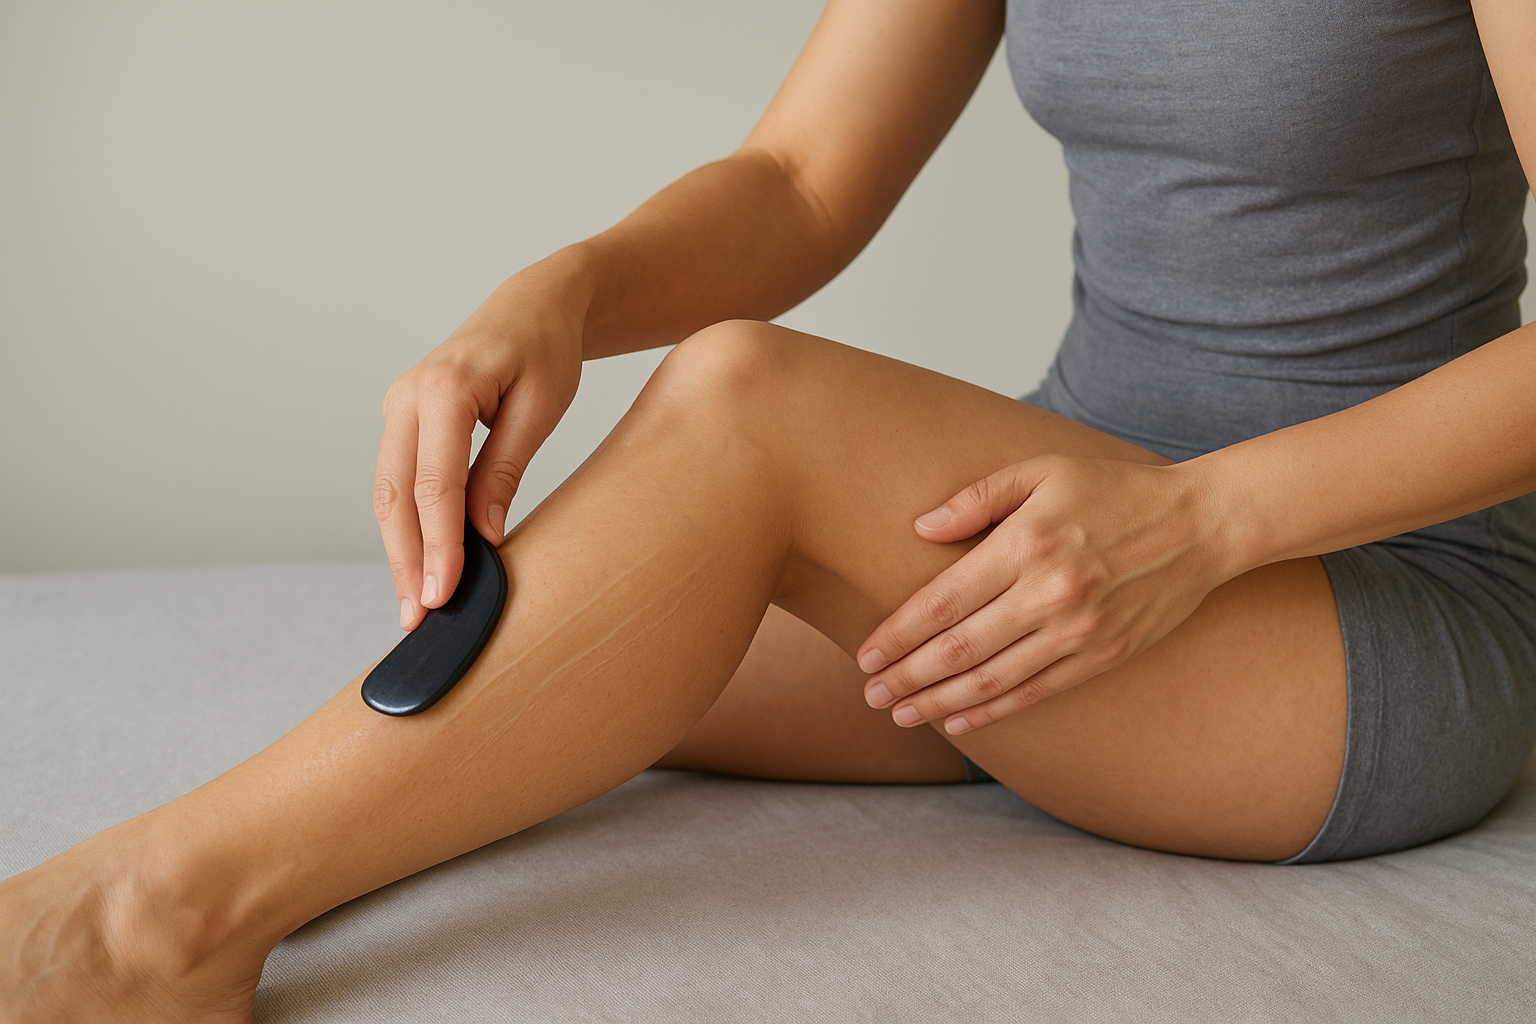
Move to your thigh by positioning the tool just above your kneecap on the inside of your leg. Glide it upward toward your groin in one continuous motion, following the natural direction lymph drains from your legs. Complete 5 strokes on the inner thigh, then 5 on the outer thigh, working from knee to hip each time. Repeat the entire sequence on your left leg, maintaining the same pressure and stroke count.
Your leg strokes need firmer pressure than facial work because lymphatic vessels sit deeper beneath thicker tissue and require more mechanical force to compress and move fluid.
Arm and belly sequence
Extend your right arm and place your tool at your wrist on the inner forearm. Sweep upward toward your elbow using pressure similar to what you used on your legs, about a 6 out of 10. Perform 5 strokes from wrist to elbow, then continue from your elbow to your armpit for another 5 strokes. Switch to your left arm and repeat the complete sequence.
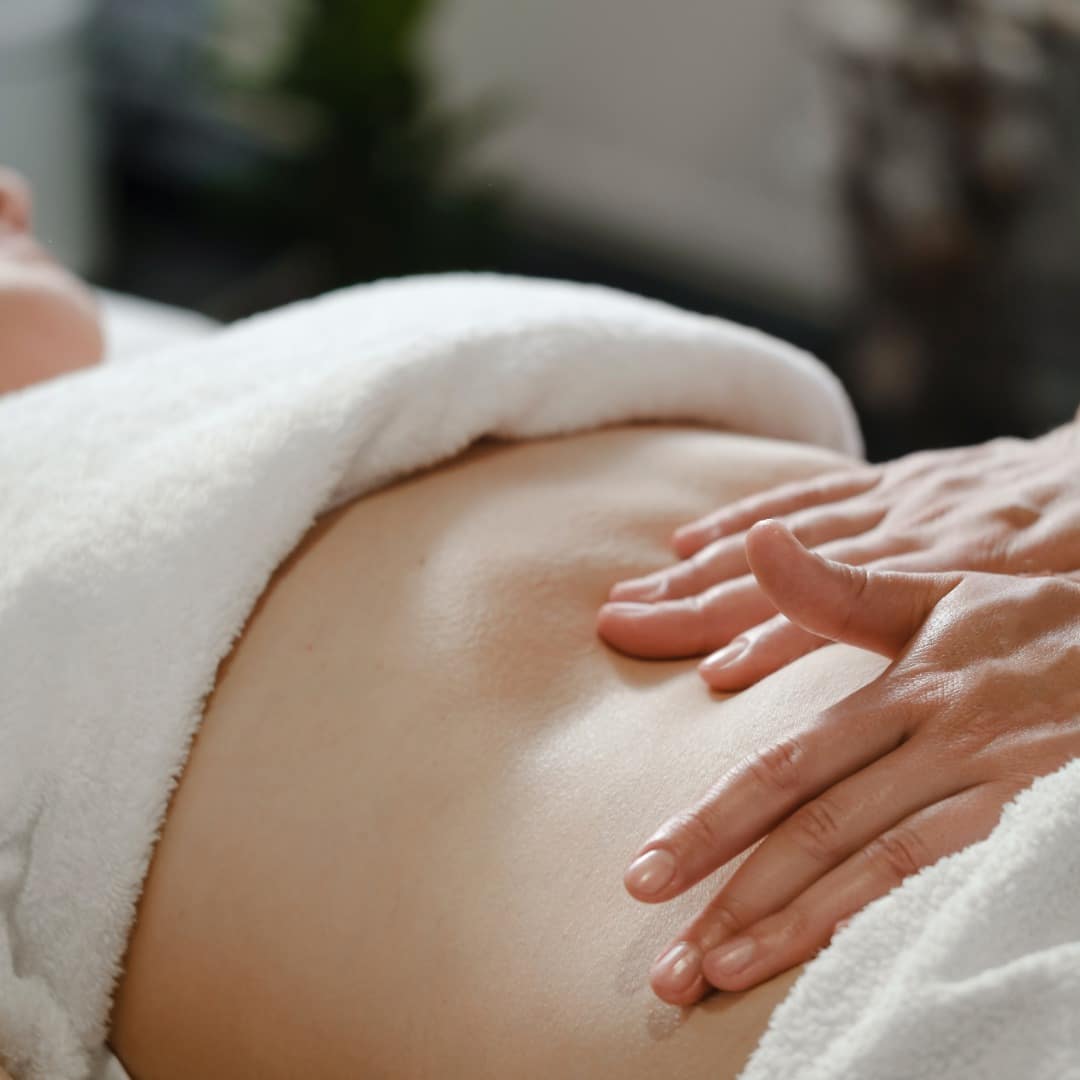
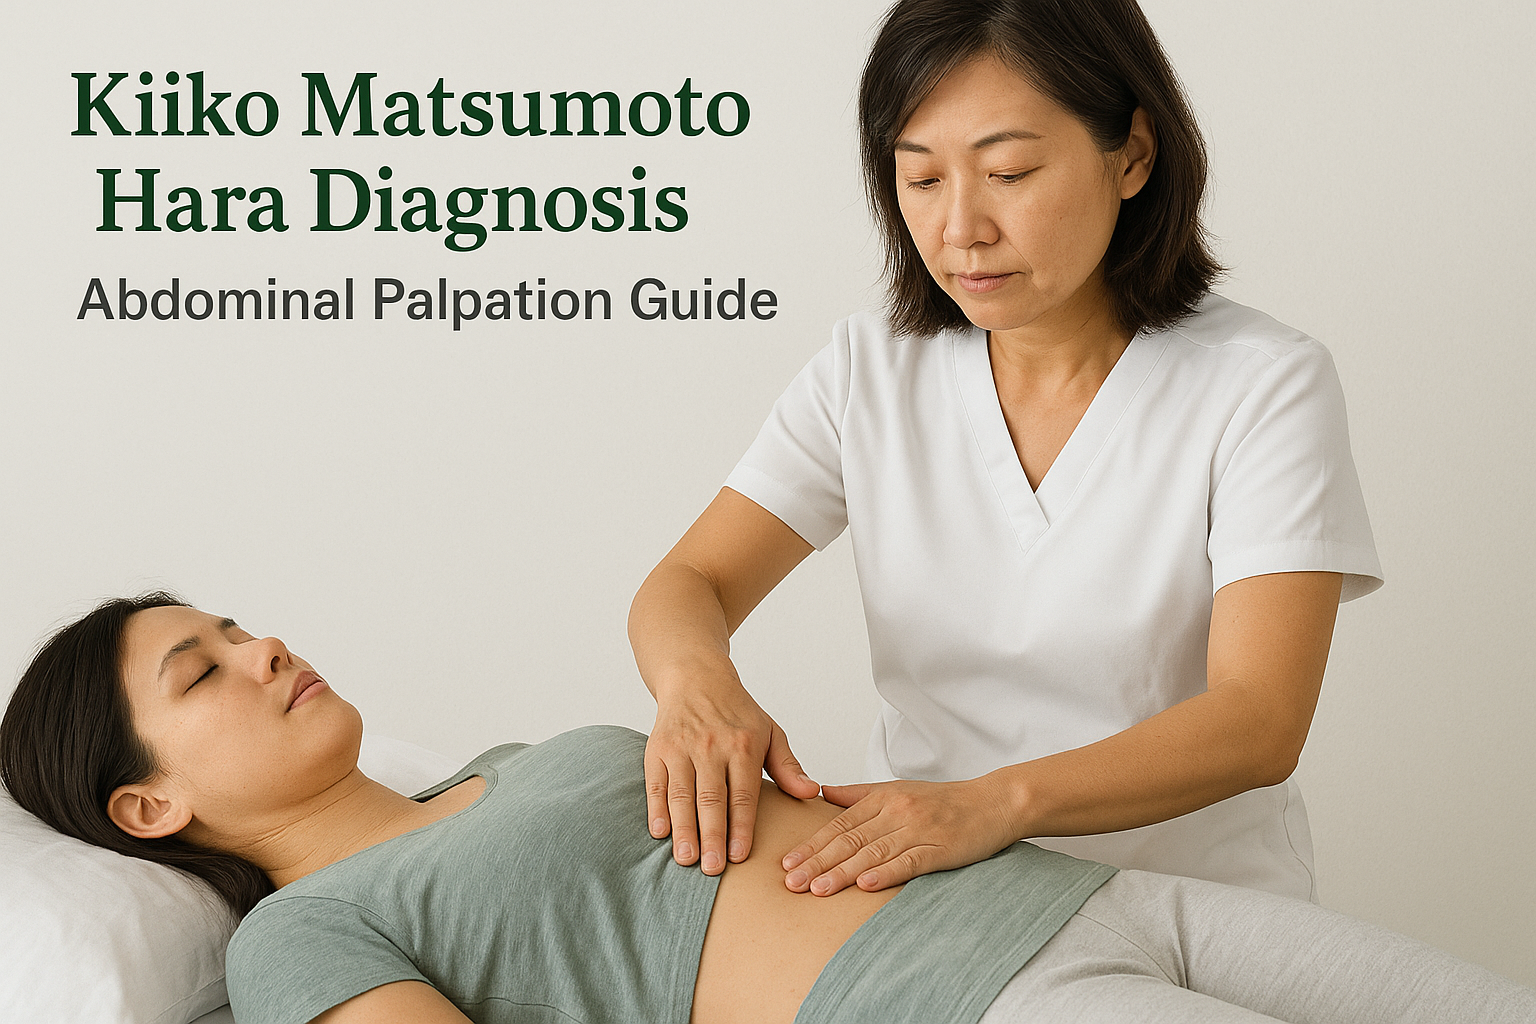
Finish with your belly by placing your tool two inches to the right of your belly button. Make gentle clockwise circles following your colon’s natural direction, using lighter pressure than you used on limbs. Complete 10 slow circles, then switch to straight strokes moving from right to left across your abdomen just below your rib cage. Make 5 horizontal strokes to encourage drainage toward the lymph nodes near your armpits. This completes your full body gua sha for lymphatic drainage routine.
How often to do it and what results to expect
Your practice frequency directly impacts how quickly you see results and how long those improvements last. Gua sha for lymphatic drainage works cumulatively, where consistent sessions train your lymphatic vessels to function more efficiently over time, but you’ll notice immediate effects after a single proper session. Understanding the difference between short-term drainage benefits and long-term system improvements helps you set realistic expectations and stay motivated through the learning curve.
Daily practice versus occasional sessions
Daily facial routines deliver the most dramatic and sustained results because you prevent fluid from accumulating in the first place rather than constantly playing catch-up with existing puffiness. Commit to 5 minutes each morning after cleansing your face, and you’ll maintain consistent contour definition, reduced under-eye bags, and that fresh, awake appearance throughout the day. Your lymphatic system responds to regular stimulation by improving its baseline efficiency, much like how muscles strengthen with repeated exercise.
Body work requires less frequency since your limbs naturally stay more active than your face. Practice your leg and arm routine 3 to 4 times per week if you sit or stand for long periods, or after workouts when fluid buildup peaks. Increase to daily sessions only if you’re dealing with chronic swelling or recovering from injury. Your belly sequence works best when performed 4 to 5 mornings per week before breakfast to address overnight stagnation and support digestive function.
Timeline for visible improvements
Facial puffiness reduces within 10 to 15 minutes of completing your routine, with maximum de-puffing visible for the next 2 to 4 hours before gradual fluid return. You’ll notice sharper jawline definition, flatter under-eye areas, and lifted cheekbones immediately after your session. After two weeks of daily practice, these improvements last longer throughout the day as your drainage pathways maintain better tone between sessions.
Body results appear more gradually since you’re working with larger fluid volumes and deeper tissue. Expect to see noticeable reduction in leg heaviness after one week of consistent practice, with visible decrease in ankle swelling by week three. Your belly bloat responds within days if the primary cause is lymphatic stagnation rather than digestive issues or inflammation.
Consistent practice creates lasting improvements in how efficiently your lymphatic system processes fluid, not just temporary relief from current puffiness.
Signs your routine is working
Track these specific indicators to confirm your technique delivers results. Your face should stay less puffy after waking as you continue daily sessions, requiring less aggressive morning drainage work over time. Jewelry fits more consistently throughout the day without tightness developing by evening, particularly rings and watch bands on arms you’ve treated regularly.
Physical sensations change as your lymphatic function improves. You’ll feel lighter and more energized within 30 minutes of completing body work, with less heaviness in your legs after standing or sitting for extended periods. Your skin texture becomes smoother and more even-toned as improved circulation delivers fresh nutrients while clearing metabolic waste that contributes to dullness and congestion.
A simple way to keep the habit
You need a consistent trigger that reminds you to practice before your routine becomes automatic. Place your gua sha tool next to your toothbrush or coffee maker, somewhere you visit every single morning without thinking. This visual cue eliminates the decision-making that kills most new habits before they stick. Set a phone reminder for the first two weeks if you forget easily, then remove it once your body expects the practice.
Track your sessions on a basic calendar by marking an X for each day you complete your routine. Seeing an unbroken chain of marks builds momentum that makes skipping feel wrong. Your gua sha for lymphatic drainage practice takes less time than scrolling social media, so the barrier isn’t time availability, it’s breaking the inertia of not starting.
When your at-home practice reaches its limits, professional assessment identifies underlying problems that self-care can’t address. Doc Blackstone Acupuncture provides needle-free treatments using our signature ceramic spoon technique for deep lymphatic work that goes beyond surface drainage.